Initial Interface and Navigation
1. Initial Interface and Navigation
When you open Adobe Illustrator for the first time, you will see the main interface. Here, you can:
Create a new document
Open an existing document
Select recent files you've worked on
Start a project with an existing template
2. Creating a New Document
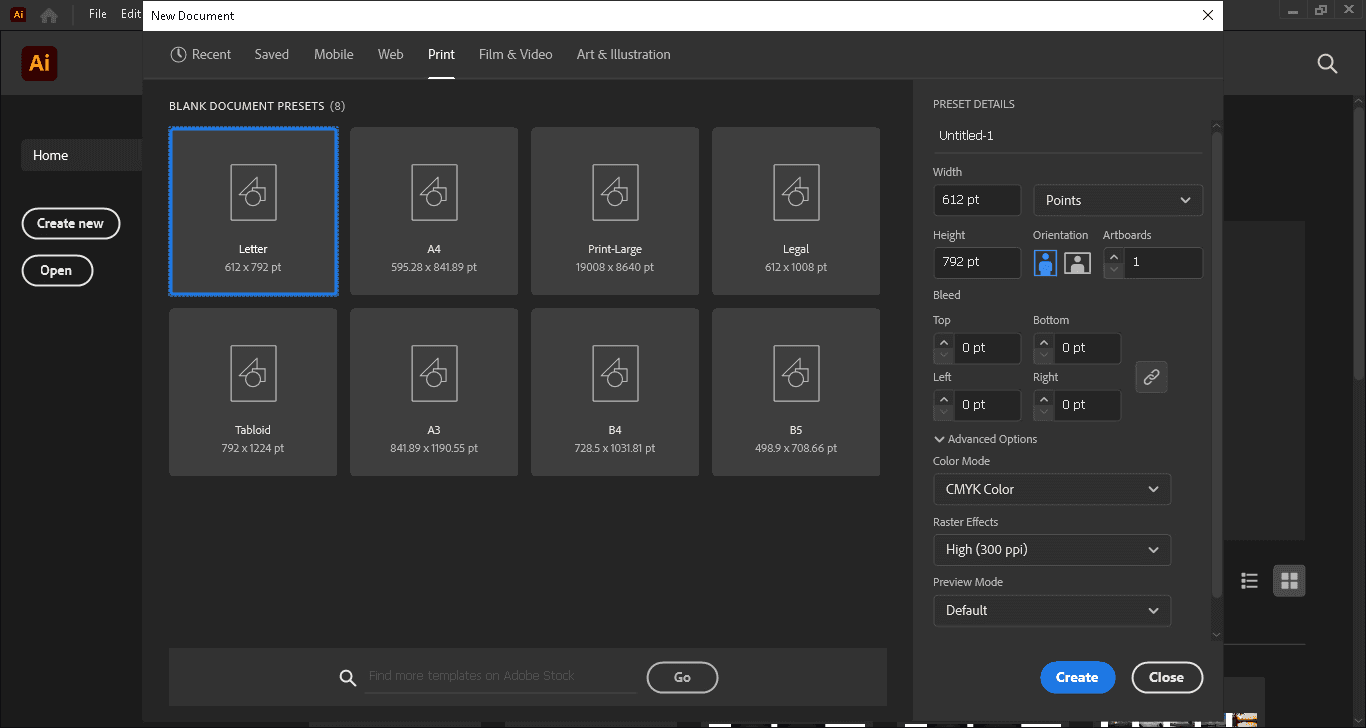
Click "Create New": This opens the "New Document" window with various templates.

Select "Print": Choose the "Letter" template.

Set Preset Details:
File Name: Enter "New Key".
Width and Height: Adjust as needed.
Unit of Measurement: Select "Inches".
Artboards: Choose "1".
Orientation: Select "Portrait" or "Landscape".
Click "Create": This opens a new document with a single artboard.

3. Interface Customization
Set Up Your Workspace:
Go to Window > Workspace > Essentials Classic.
If the interface does not update, go to Window > Workspace > Reset Essentials Classic.
Properties Panel: This panel shows the properties of the selected items. Ensure it's visible on the right-hand side.
4. Using the Artboard Tool
Edit the Artboard: Select the Artboard Tool from the toolbar.
Resize or move the artboard as needed.
Creating Additional Artboards:
Draw new artboards on the workspace.
5. Adjusting Panels
Rearrange Panels: Drag the "Layers" panel from its current position to a more convenient spot.
Close unnecessary panels like "Libraries".
6. Understanding the Tools
Selection Tools: Quick Selection Tool: Select and move whole objects.
Direct Selection Tool: Select and manipulate anchor points.
Other Tools: Experiment with basic shapes and colors.
Explore fill and stroke settings.
7. Menu Overview
File Menu: Create, open, save, and export documents.
Edit Menu: Undo, redo, cut, copy, and paste actions.
Object Menu: Access various object-related actions.
Type Menu: Manage text and font settings.
Select Menu: Select objects based on specific criteria.
Effect Menu: Apply effects to objects.
View Menu: Adjust the display of the interface.
Window Menu: Manage which panels are displayed.
8. Using the Zoom and Pan Tools
Zoom Tool: Zoom in and out on the workspace.
Pan Tool: Move around the workspace.
Use the spacebar as a shortcut for the pan tool.
9. Grouping and Isolation Mode (Property Panel, under Alignment)
Grouping Objects: Select multiple objects and group them to move and manipulate them together.
Isolation Mode: Double-click a group to isolate and edit it without affecting other parts of the design.
Exit isolation mode by clicking outside the isolated group or using the breadcrumb navigation.
10. Final Steps
Now that you are familiar with the basics, you can start working on your designs. In the next lesson, we'll dive deeper into using the tools to create amazing designs.